Invoices

Includes a detailed explanation how to generate invoices for either B2B or B2C customers

Create an invoice in the merchant cabinet

Create an invoice

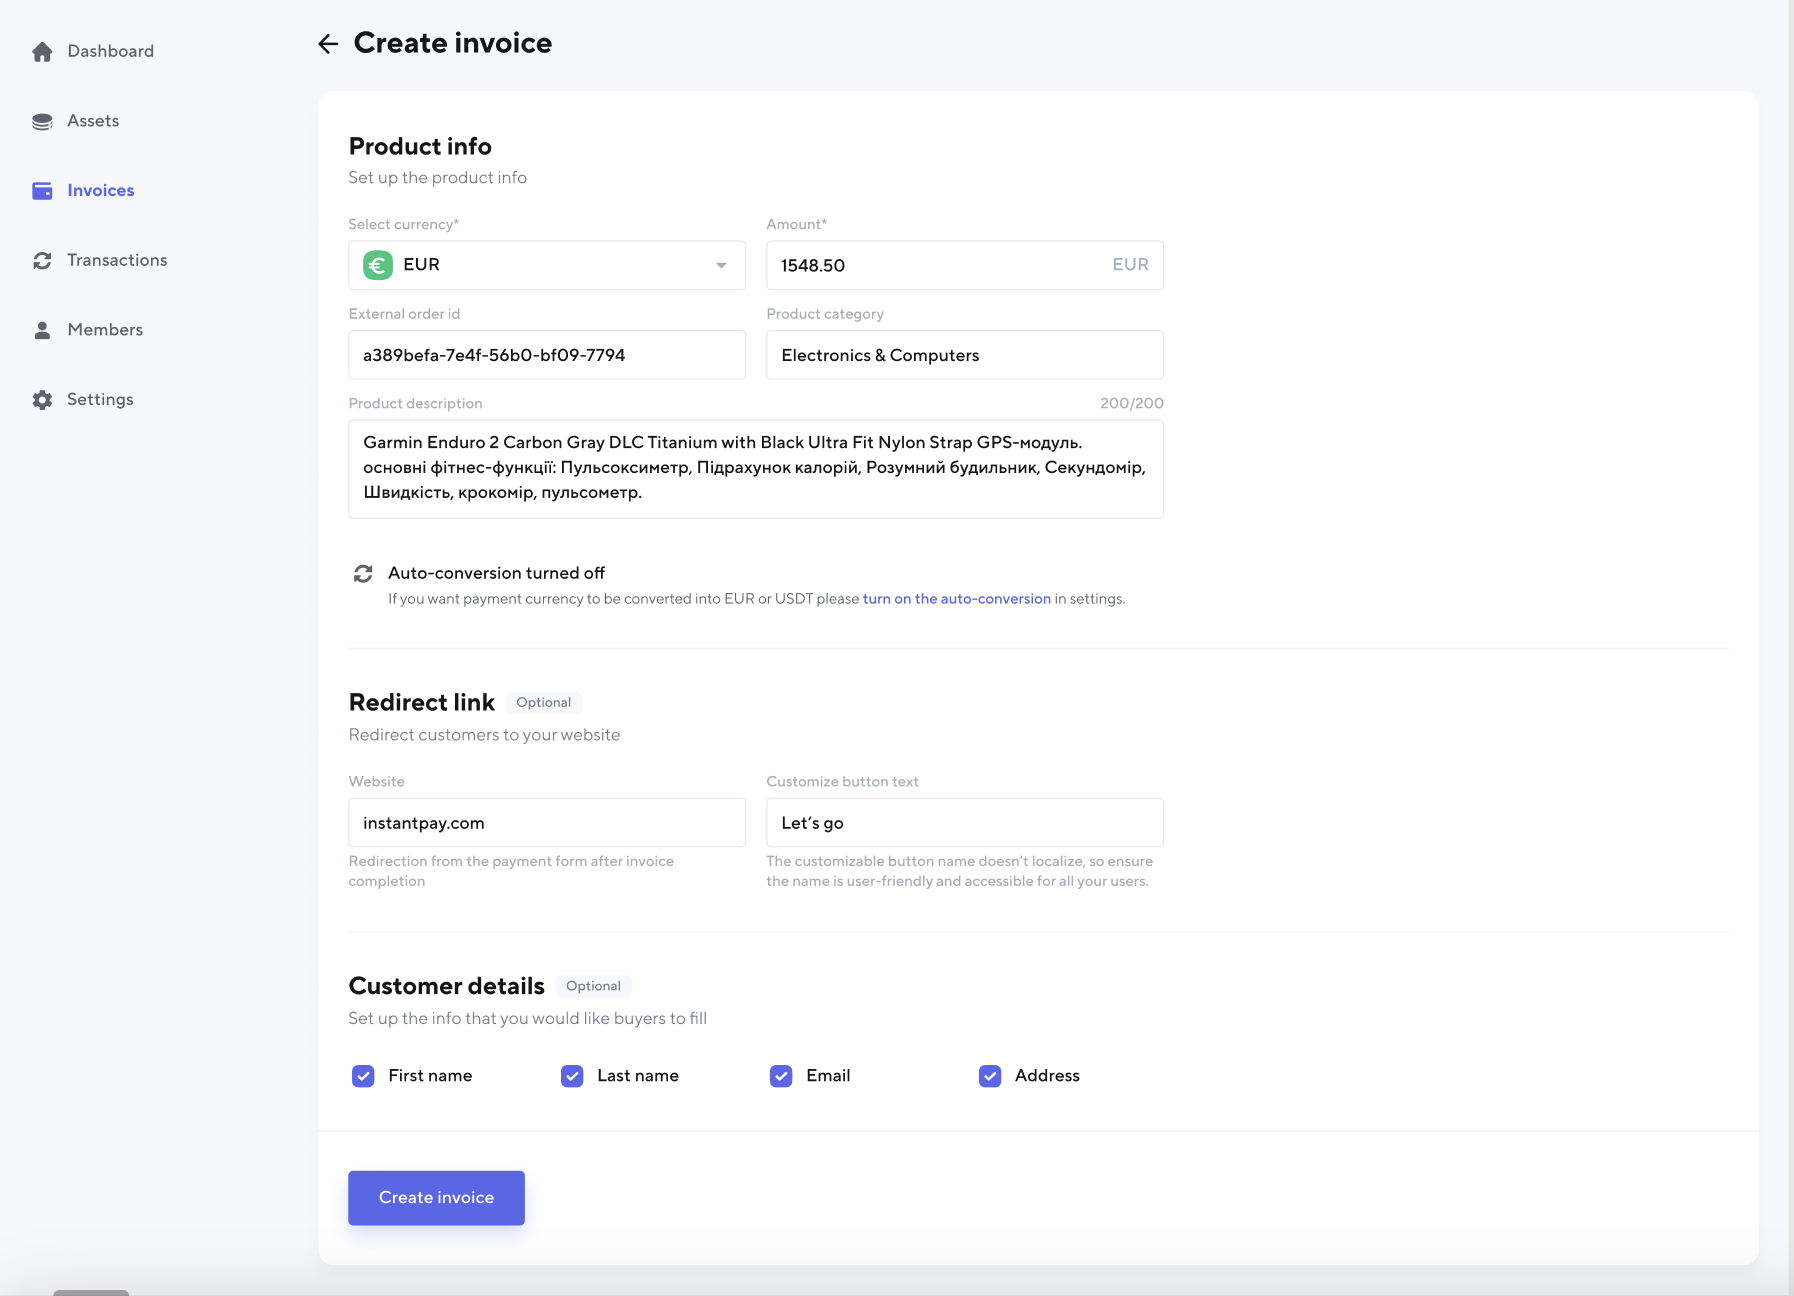
To create an invoice in the merchant cabinet, simply login to your account and click on the "Create Invoice" button in Invoices. From there, you can enter the invoice details, including the payment amount and currency, and any additional notes or comments. If you would like to have the payments converted into EUR or USDT automatically, then you should turn on the auto-conversion in Settings, check the details Auto-conversion

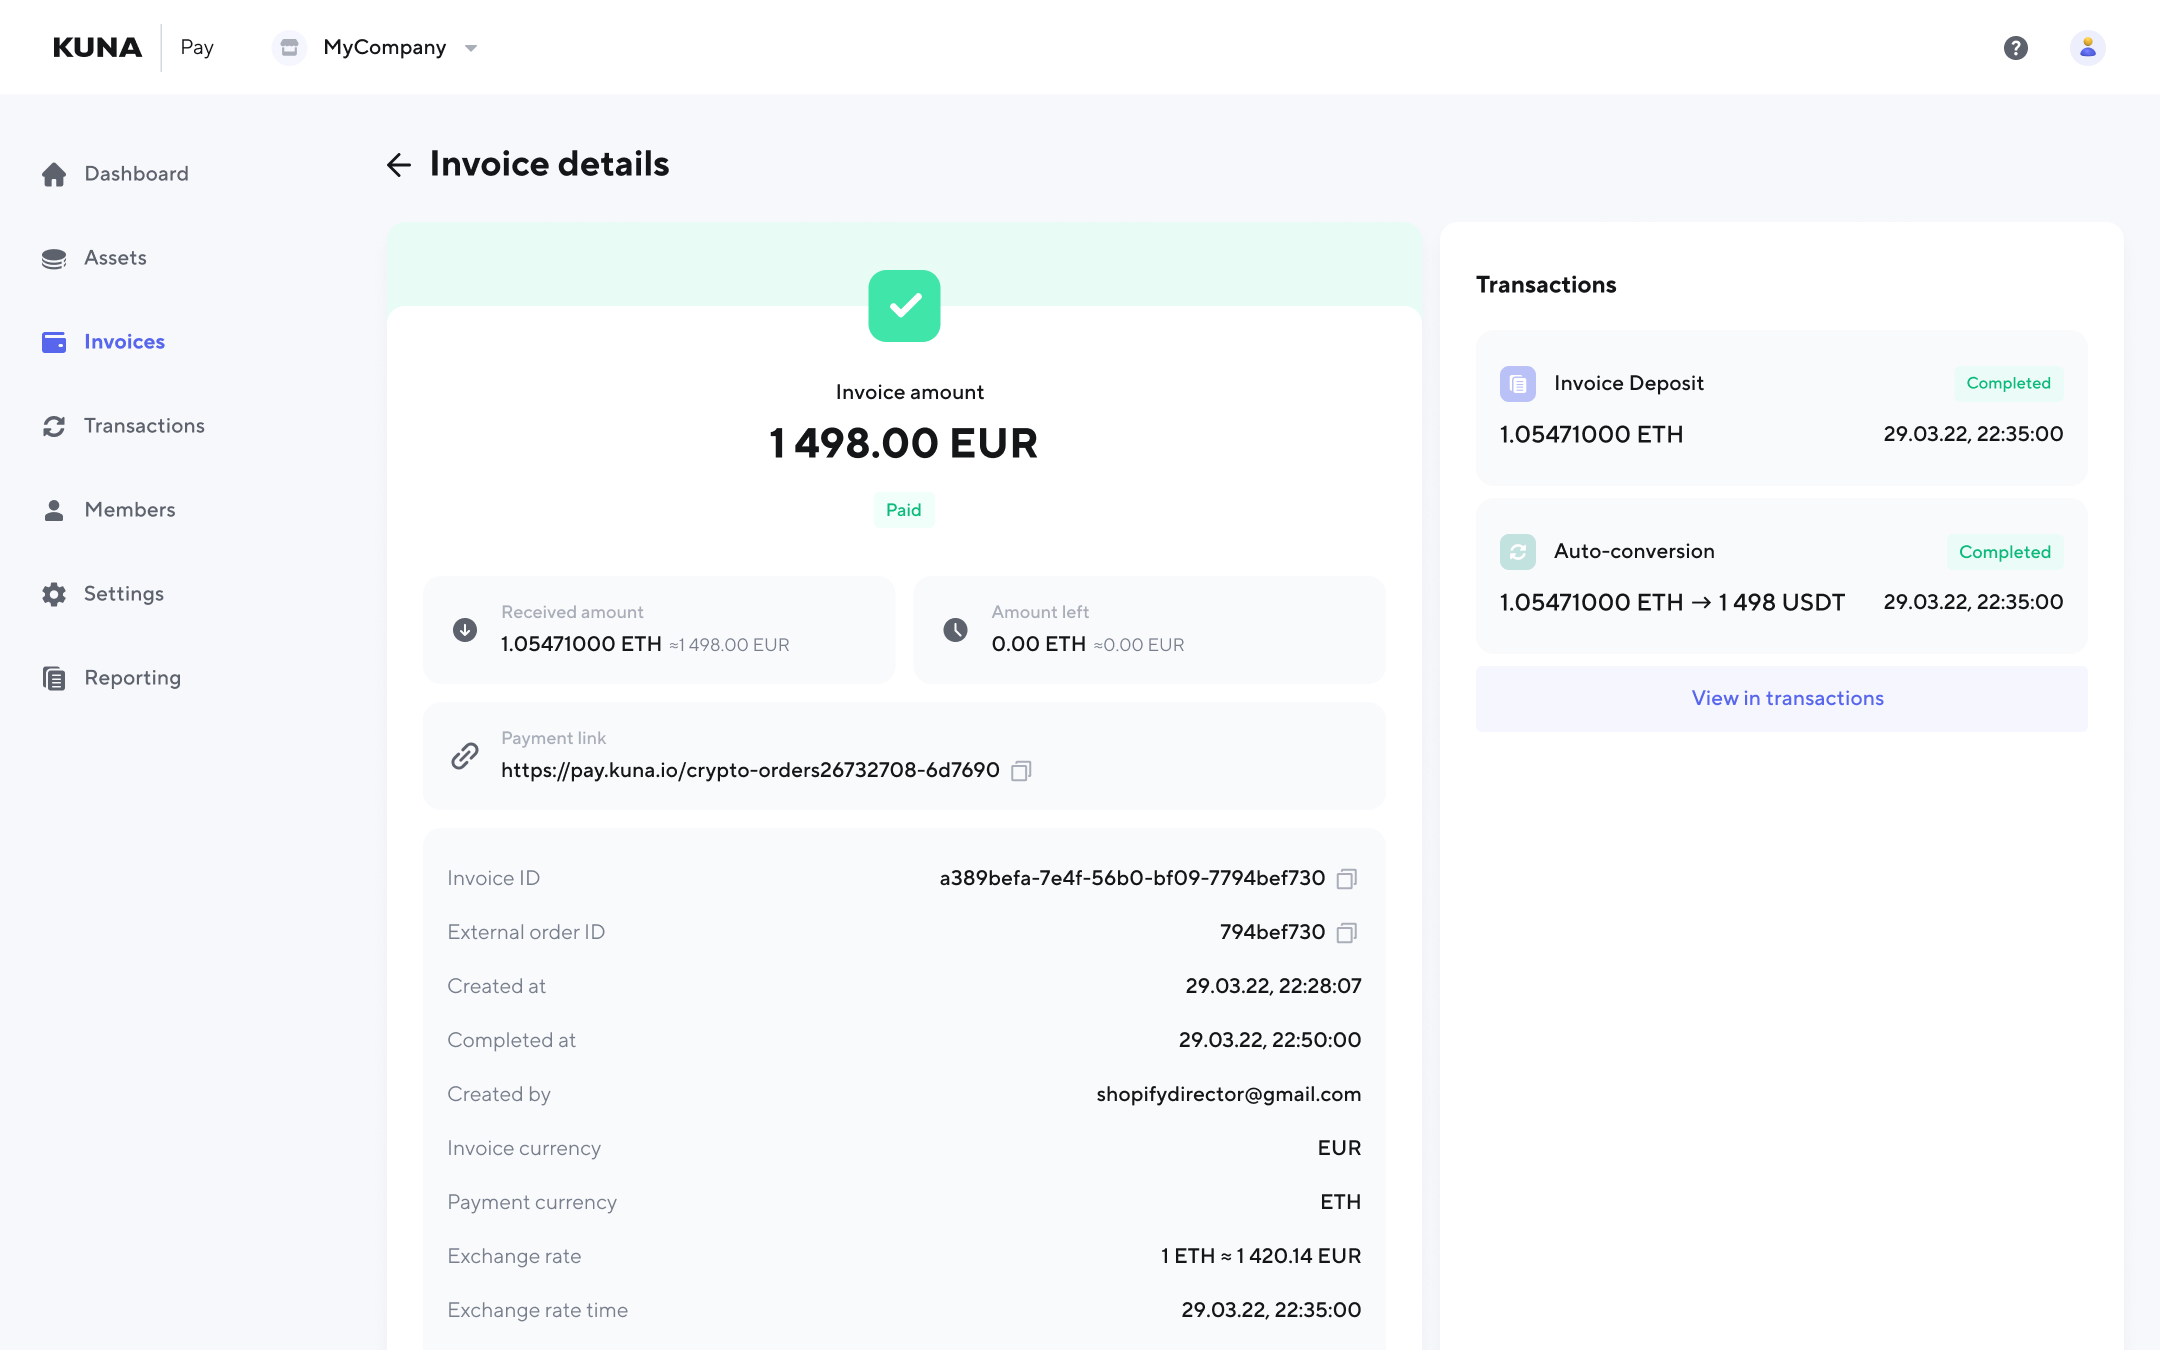
View the invoice details

Once you've created an invoice and sent it to the buyer, the buyer can make the payment using their preferred cryptocurrency, and the payment will be processed and credited to your account.

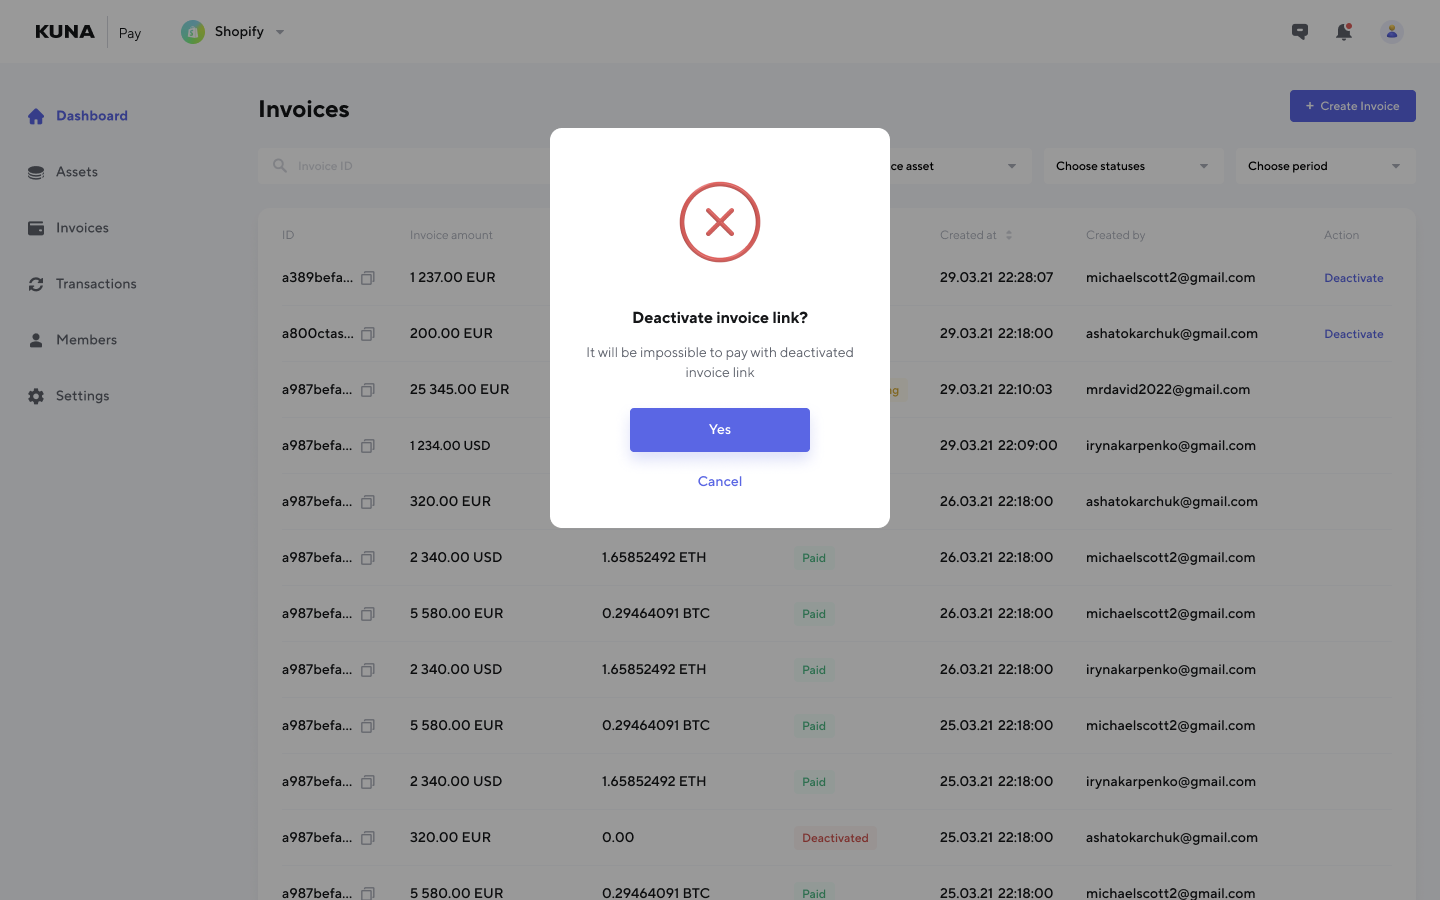
Deactivate an invoice

You have the option to deactivate any links before the buyer initiates a payment, particularly when a payment is no longer required. This feature ensures that unnecessary transactions can be prevented or halted, offering you greater control and flexibility in managing your payment processes.

πŸ“˜

Who can deactive invoices?

The capability to expire links is vested in the roles of owner, admin, and support, enabling comprehensive control over all links. For agents, the authority extends solely to expiring the links they have personally created, ensuring a more targeted and secure link management system.
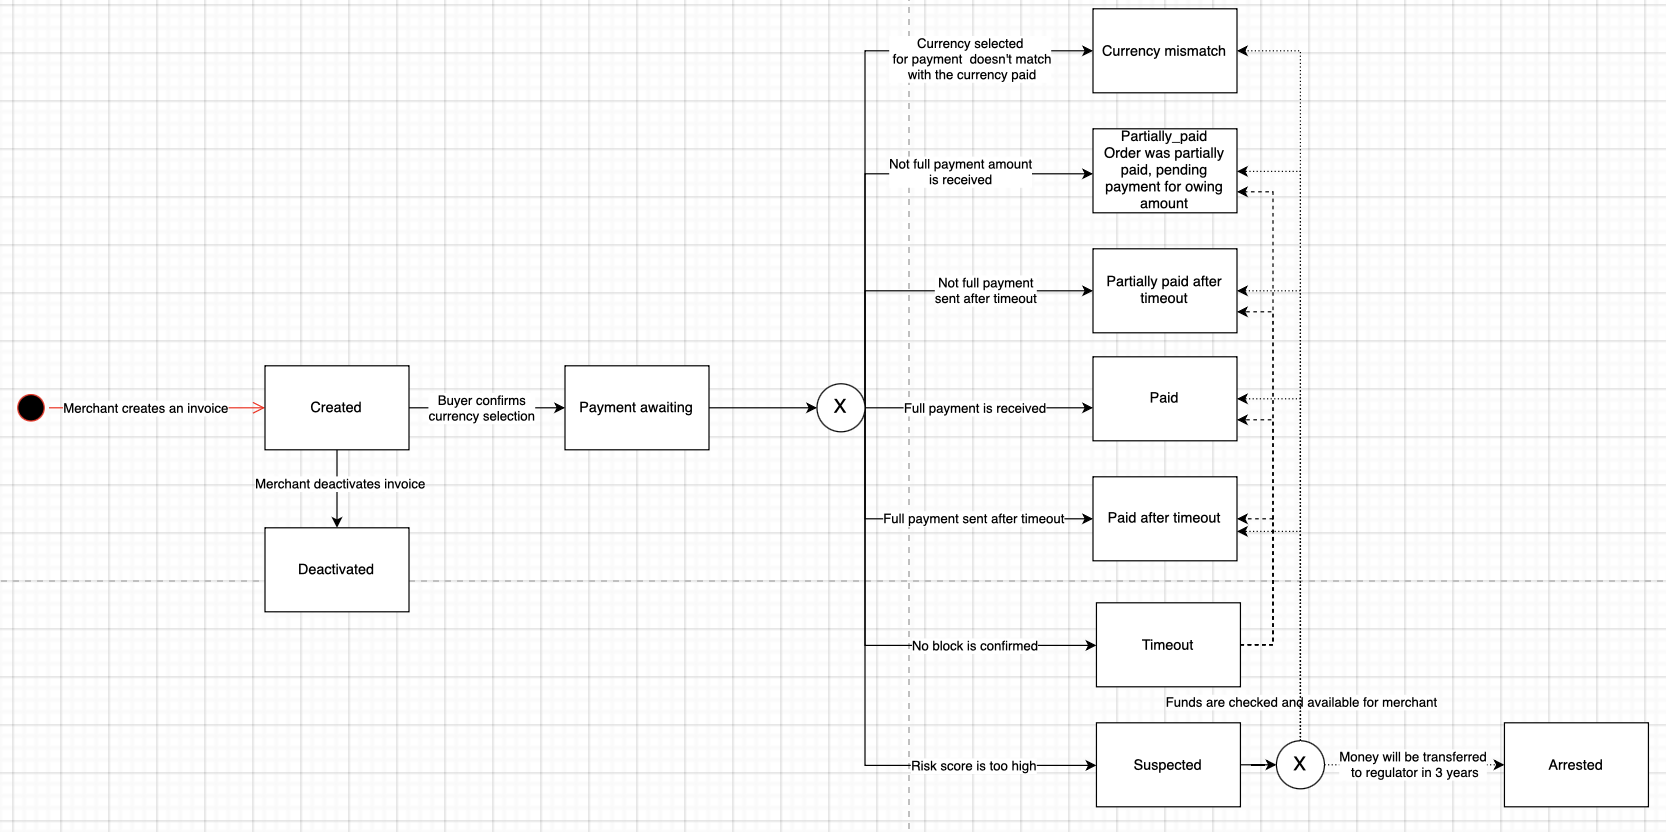
Invoice status flow


Other good-to-know features

  1. You can customize your invoices by adding your logo and contact information which will be available during invoice payment.
  2. The KUNA Pay platform allows you to affect the exchange rate during customer purchase and affects the price which is shown for buyers in cryptocurrency. Check details: Correction coefficient

πŸ’«

Effortlessly dispatch invoices to customers globally, allowing them the convenience of settling payments using their preferred cryptocurrencies.


Create an invoice via API

Alternatively, you can use our API to create invoices programmatically. Our API is well-documented, easy to integrate with your existing systems, and allows you to create invoices automatically from your e-commerce store.

To create an invoice use /v1/invoice


Callbacks

Callbacks for invoices in the standard mode operate when there is a change in the invoice status, but it is also possible to enable transactional callbacks for each deposit associated with the invoice.

To receive callbacks for an invoice, you need to pass the following parameters when creating /v1/invoice:

{
  callbackUrl: string;
  shouldSendTransactionalCallback?: boolean; // Enables transactional callbacks
}

You can read more about callbacks in this article Callbacks


Customization

Redirect the user once the invoice is paid

There is an option to redirect the user to a specific page after the invoice has been paid. To achieve this, you can pass the following parameters when creating an invoice through the RestAPI:

{
  customization?: {
    redirectUrl: string; // URL to redirect the user once the invoice is paid.
    redirectButtonTitle?: string; // Custom text to display on the button for redirecting the user.
  }
}

The specified redirectUrl will have parameters added to identify which invoice the redirect corresponds to. These parameters include:

{
  invoiceId: string; // UUID
  orderId?: string; // externalOrderId from Invoice
}

Example URLs:

  1. https://example.com/order?invoiceId=506c695a-4187-4463-ac41-07dc0782cb0e&orderId=external-order-id
  2. https://example.com/order?invoiceId=c08db5ab-093f-4dd8-81c7-8065ffbbe955

Gather info about the Buyer

There is a possibility to collect information about the Buyer before paying the Invoice. To do this, you can pass the following parameters when creating an invoice through the RestAPI:

{
  questionnaire: {
    schemaFields: [
      {
        name: string
      }
    ]
  }
}

The available fields can be obtained through the route in RestAPI: [GET] /v1/invoice/questionnaire